Last Updated on October 17, 2023
Whether you want to start a vegetable garden in your backyard or grow your own herbs and flowers in containers, this simple 20-step guide to gardening for beginners will provide you with the essential knowledge on how to create a successful garden.

*This post contains affiliate links. If you choose to purchase any of the products I have recommended, I may receive a commission at no cost to you.
Gardening is a wonderful and rewarding hobby that can bring a sense of peace and fulfillment to your life. However, starting a garden for a beginner can be overwhelming. That’s why I’ve put together this comprehensive 20-step beginner’s guide to gardening .
In this guide, I’ll cover the basics of gardening, from planning your first garden and choosing the right plants and tools, to caring for your garden throughout the seasons and harvesting your crops.
Let’s begin!
Planning Your Garden
Before starting a garden, it’s essential to have a plan in place to ensure its success.
A well-thought-out plan can help you avoid common mistakes and ensure that you end up with a garden that is not only beautiful but also functional and productive.
Step 1. Research different garden types
Before diving into garden planning it’s important to learn about different garden types and choose the one that suits your needs.
When deciding on the type of garden to create, consider the following factors:
- available space
- type of plants to grow
- amount of money you are willing to spend
For example, square foot garden is a great option for those with limited space. This method involves growing plants in a 4 by 4 feet raised bed divided into 1′ x 1′ square blocks.
Learn how to create a square foot garden in Square foot gardening guide
Container gardening is another option for those with limited space or who want to garden on a patio or balcony. This method involves growing plants in pots or containers and can be a great way to grow herbs, small vegetables, or even fruit trees.
Check out this step by-step instruction on how to start and grow container garden
Raised garden beds are another popular type of garden. They are essentially elevated boxes filled with soil that provide a contained space for planting.
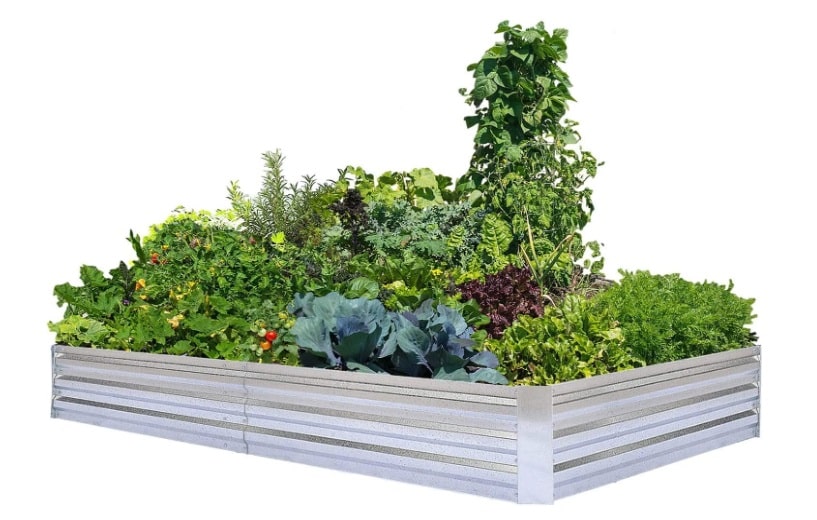
Raised beds have several benefits, including better drainage, easier maintenance, and the ability to control the quality of soil. They can also make gardening more accessible for those with physical limitations as they can be built to a height that is comfortable for the gardener.
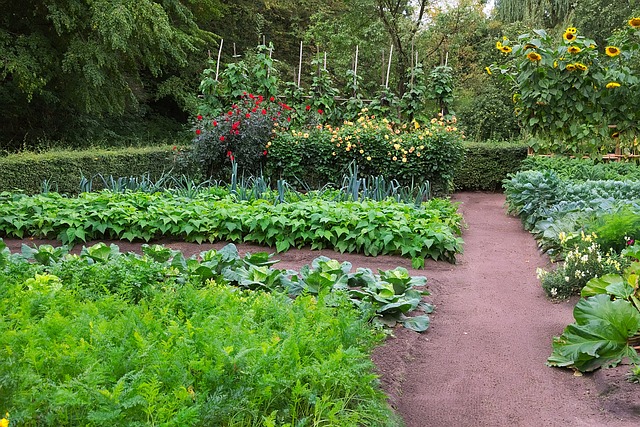
If you’re interested in a more traditional type of garden, you may want to consider a potager (kitchen garden). This type of garden combines both ornamental and edible plants. Potagers are often designed to be both beautiful and productive and can be a great option for those who want to grow a variety of vegetables, fruits, and flowers.
To discover more, view this potager article.
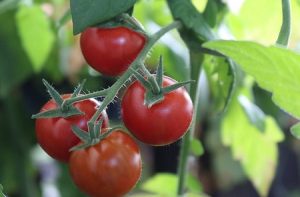
If you have the space available, a traditional in-ground vegetable garden can be a great option for growing a wide variety of crops. This type of garden involves preparing a plot of land and planting directly in the soil. With an in-ground garden, you have more space to grow larger plants such as tomatoes, squash, and melons, and you can plant in rows or blocks depending on your preference.
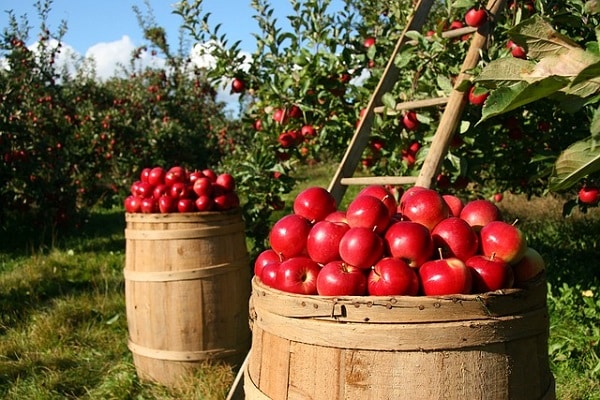
If you have a large yard, you may also want to consider planting an orchard. Fruit trees can provide a bountiful harvest of fresh, delicious fruit and can be a beautiful addition to your garden. When choosing fruit trees, be sure to select varieties that are well-suited to your climate and soil conditions. Apples, pears, cherries, and peaches are all great options for a backyard orchard.
You might also grow plants in grow bags, buckets and even straw bales!
Finally, if you don’t have access to outdoor space, you may want to consider an indoor garden. This can involve growing plants in a sunny window, using grow lights, or even setting up a hydroponic system. Indoor gardening can be a great way to grow herbs, microgreens, and other small plants, and can be a great way to add greenery to your home.
Explore more about Aerogarden indoor gardening
By educating yourself on different garden types and gardening methods and picking the one that works best for you, you can create a garden that meets your needs and preferences.
Step 2. Identify your local climate zone
Before you start planning your garden, you should find out in which climate zone you live. Knowing your climate zone can help you choose plants that are well-suited to your growing conditions and ensure that your garden thrives.
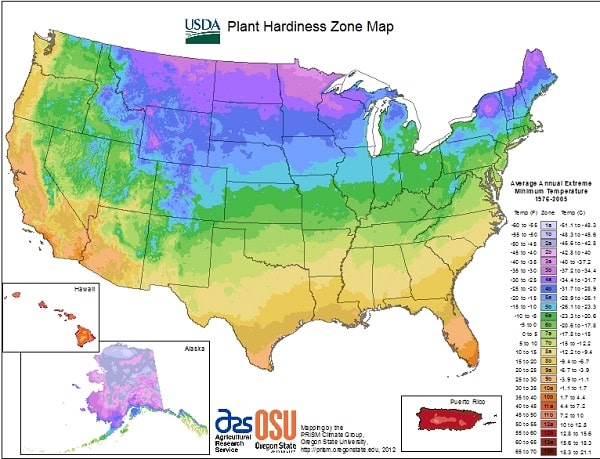
Go to usda.gov for interactive Plant Hardiness Zone Map
One of the most widely-used climate zone systems is the USDA Plant Hardiness Zone Map, which divides the United States into 13 different zones based on average annual minimum temperatures. with each zone representing a 10°F (5.6°C) difference in temperature.
This map is a useful tool in determining the average first and last frost dates for a particular region. First and last frost dates are important for gardeners because they help determine the length of the growing season in a particular area.
The first frost date is the average date when the temperature first drops to 32°F (0°C) or lower in the fall, while the last frost date is the average date when the temperature last drops to 32°F (0°C) or lower in the spring.
Knowing these dates is crucial to gardening. If you plant your seeds too early, they may be damaged or killed by frost, while planting too late can result in a shortened growing season and smaller harvest.
By knowing your USDA zone and the average first and last frost dates for your area, you can choose the appropriate time to plant your crops and maximize your chances of a successful harvest.
Want more gardening tips from experts? Then check out the article on Redfin where we were featured: ‘Plant, Grow, Harvest: Your Guide to Starting a Vegetable Garden for Your Home’.
Step 3. Decide if you will garden organically
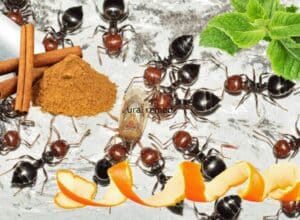
Organic gardening relies on natural fertilizers and pest control methods, such as compost and companion planting, to create a healthy and sustainable ecosystem. On the other hand, synthetic gardening involves the use of chemical fertilizers and pesticides to promote plant growth and protect against pests and diseases.
While synthetic products may provide quick results, they can harm beneficial insects and soil microorganisms, and potentially contaminate groundwater. Ultimately, the decision to garden organically or with synthetic products depends on personal values and priorities, such as health and environmental concerns.
Step 4. Select the right location for your garden
One of the most important steps in starting a garden is choosing the right location.
The success of your garden largely depends on where it is located. You need to choose an area that gets enough sunlight and has good soil drainage. Ideally, your garden should receive at least six hours of sunlight per day, and be located in an area with good air circulation.
You should also consider any potential obstacles that might impact the growth of your plants, such as trees or buildings that block the sun.
It’s also important to take into account prevailing winds because they can affect the growth of your plants by drying them out or causing them to become too cold, so consider the direction of the wind in your area and choose a location that is sheltered from strong gusts.
Access to water is also a crucial consideration for any garden. If your garden is too far from a water supply, you may have difficulty keeping your plants hydrated. Make sure that your garden is within reach of a reliable water source, such as a hose or irrigation system.
Additionally, if you live in an area with water restrictions, be sure to plan your garden accordingly and choose plants that require less water or can tolerate drought.
Step 5. Choose what to grow
Once you’ve determined the last and first frost dates for your area and found a suitable location for your garden, it’s time to decide what you want to grow.
Consider your goals for the garden and what you enjoy eating or looking at.
- If you’re looking to grow vegetables, fruits or berries, choose plants that are suited to your climate.
- If you want to grow flowers, consider the colors and scents that you prefer.
Step 6. Determine how much space you need
The amount of space you’ll need will depend on the size and type of plants you want to grow,and their growth habitsl. Some plants, such as vining crops, will require additional space to grow and climb. Also, you should take into account the distance between plants to ensure that they have enough room to grow and receive adequate sunlight and nutrients.
Another factor to consider is your own personal preferences. If you want a garden with plenty of walking space or room for outdoor furniture, you’ll need to leave more space between plants. On the other hand, if you’re looking to maximize your growing space, you can plant more densely or use techniques like interplanting or succession planting to increase your yield.
Get inspired and learn more tips and tricks on planning a garden in related articles:
11 tips on planning a small garden
Step 7. Make a rough sketch or plan of your garden
Make a plan of your garden taking into account the size and spacing of the plants Use the gardening planner that has grid paper pages where you can draw a general layout of your garden as well as plan your individual garden beds.
Step 8. Get gardening tools and supplies
In order to start gardening, you will need to have the right tools and supplies on hand. Basic tools such as a shovel, rake, hoe, hose and trowel are essential for a vegetable garden with in-ground beds.
Wonder how many tools you really need? I bet it’s less than you think! Read about truly must-have gardening tools for a different garden types with the best garden tools recommendation here
Gloves, kneeling pad and proper gardening attire are also helpful to have to protect your hands and make gardening a pleasurable experience.
Depending on the type of gardening you’re doing, you also might need wheelbarrow, trellis, or stakes.
In addition to tools, you will need soil, seeds or seedlings, fertilizer, and any other amendments or supplies recommended for the specific plants you’re growing.
Don’t let the list intimidate you – you can start small and gradually build your collection of tools and supplies as you become more experienced.
A note! You should also think about how much time, money, and effort you’re willing to put into maintaining your garden. I need to warn you, gardening can be an expensive hobby!
Learn more about useful gardening tools and supplies in this section.
Preparing Your Garden Site
Preparing your garden site is an essential step in creating a thriving garden. Here are some things to consider:
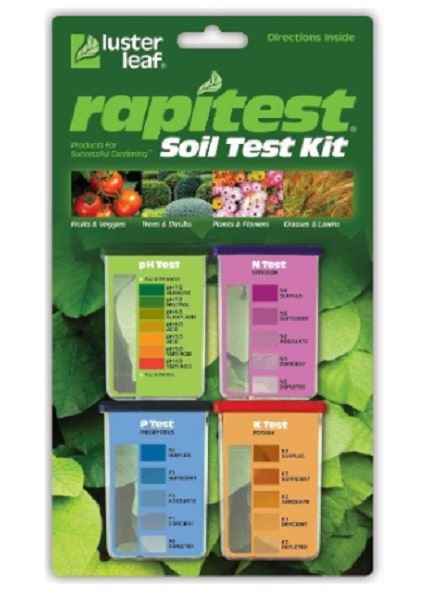
Step 9. Test your soil
It’s important to know what kind of soil you have before planting your vegetable garden in in-ground beds and what nutrients it may be lacking. You can get a soil test kit from a garden center, on Amazon or cooperative extension office. Based on the results, you may need to add fertilizers, lime, or other soil amendments to improve soil quality.
If you are going to grow a garden in raised garden beds or containers, your task is much easier. Just buy good quality potting soil formulated for the plants you want to grow.
Step 10. Prepare the site
Once you have a good understanding of your soil, it’s time to prepare the site.
If you plan to use traditional in-ground garden beds, begin by clearing away any obstacles such as rocks, twigs, or debris that may interfere with planting.
Then, spread the required amendments on top of the soil according to your soil test results, and mix them in by tilling with a tiller or turning the soil with a shovel.
If your soil pH was good, add a layer of compost over your garden site, and work it into the soil to a depth of 6-8 inches. You can make your own compost from yard waste and kitchen scraps or purchase it from a garden center.
If you want to edge your in-ground garden beds, consider using cinder blocks or bricks. Also, lay walkways between beds using mulch, pebbles, or recycled rubber mats on top of landscaping fabric to suppress weeds.
“If you prefer to garden in raised garden beds, build them with wood, stone, or other materials. Alternatively, you could consider getting a ready-made cedar or galvanized raised garden bed, or even an elevated planter box to save your back. Be sure to fill your raised beds with aa high-quality organic soil mix for raised beds.
By taking the time to prepare your garden site properly, you’ll set yourself up for success and create a healthy and productive garden.
Planting Your Garden
Once you have prepared your garden site, it’s time to start planting!
Step 11. Choose the right time to plant
Before you get to work, it’s important to consider the timing of your planting.
Different plants have different optimal planting times that depend on the climate zone you’re in and whether they prefer cool or warm weather. Generally, it’s best to plant your cool-loving plants like radishes, peas, and lettuce a few weeks before the last frost, and your warm-loving veggies like tomatoes, peppers, and eggplants after the last frost date for your area.
Read related: 5 fasted growing vegetables to plant in early spring and late summer
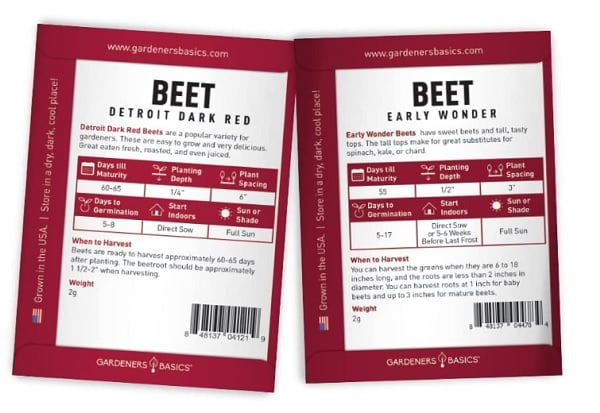
Don’t worry if you’re not sure when to plant your seeds. Each seed package you buy should have detailed information on the best growing conditions, planting time, planting depth, and spacing for your plant on the back of the package. And if it doesn’t, a quick internet search will definitely help you find the answers you need!
Since different plants have different planting times, schedule your planting using a garden planner in order to ensure that each plant is sown at the appropriate time for optimal growth and yield.
Step 12. Sow seeds or plant transplants
When you’re ready to plant, make holes for your seeds according to the depth and spacing recommendations found on the back of the seed package
The depth and spacing will vary depending on the type of plant, so be sure to read the instructions carefully. Proper spacing ensures that each plant has enough room to grow and get the nutrients it needs.
If you are starting with seedlings, carefully remove them from their containers and transplant them into the soil. Make sure to plant them at the same depth as they were in their original containers and gently pat the soil around them.
Step 13. Water your plants
After planting, it’s important to water your newly planted garden. Use a watering can or hose with a watering wand to provide a gentle, steady stream of water to the soil.
Read related:
Maintaining and Caring for Your Garden
Maintaining and caring for your garden is important to keep it healthy and productive throughout the growing season.
Step 14. Water your garden regularly and properly
One of the most important tasks is watering your garden regularly and properly. Different plants have different water needs, so make sure to research the requirements of your specific plants.
In general, most plants need about an inch of water per week. It’s best to water your garden in the morning or evening to avoid evaporation during the heat of the day.
Step 15. Fertilize if needed
If your soil is lacking in nutrients, you may need to supplement with fertilizers. There are many different types of fertilizers available, including organic and synthetic options. Be sure to read the instructions carefully and follow them to avoid over-fertilization, which can harm your plants.
Step 16. Control weeds and pests
Weeds and pests can also pose a threat to your garden. Weeds can compete with your plants for water and nutrients, while pests can eat your plants or spread disease.
It’s important to stay on top of weed control by pulling them regularly. If you have in-ground beds, a weed burner or electric tiller might help you fight weeds
Read related:
Best tillers for your home garden
An electric weed burner – an answer to a gardener’s prayers
If you have a pest problem, you may want to consider using organic methods, such as insecticidal soaps or neem oil, to avoid harming beneficial insects.
Read related:
How to keep bugs from eating your plants
Ster 17. Prune and deadhead plants as needed
Pruning and deadheading your plants as needed can help keep them healthy and looking their best.
- Deadheading is the removal of spent flowers, which can encourage new growth and prolong the blooming period.
- Pruning can also help shape your plants and improve air circulation, which can prevent disease.
With regular maintenance, your garden will thrive all season long!
Step 18. Harvest your crops at the right time
Keep a watchful eye on your plants and pick the fruits and vegetables when they’re fully ripe. Leaving them too long on the plant can result in over-ripening, which can attract pests and insects, or even cause the fruit or vegetable to rot.
Once you’ve harvested your crops, it’s time to start thinking about preparing your garden for fall.
Step 19. Fall planting
As fall approaches, it’s a good time to plant cool-weather crops. These include plants like broccoli, cauliflower, carrots, and beets. These plants thrive in cooler temperatures, so it’s important to plant them before the first frost.
You can also plant some crops for winter harvesting, such as kale, spinach, and Brussels sprouts. These plants can be harvested throughout the winter months, as long as you keep them protected from harsh weather.
The timing for fall planting will vary depending on the first frost date in yourparticular area. Generally, it is recommended to plant crops in the fall a few weeks before the first expected frost,
The exact timing for fall planting will depend on the specific crops you want to plant, as well as the climate and weather patterns in your area
Read related:
Step 20. Preparing your garden for winter or offseason
Once you’ve harvested your crops and finished planting for the fall and winter months, it’s time to start cleaning up your garden.
Clear away any dead plant material, weeds, and debris. This will help prevent pests and diseases from overwintering in your garden.
You can also add a layer of compost or mulch to protect your soil and help retain moisture. With a little bit of effort, you can ensure that your garden will be ready to thrive again come springtime.
Final Thoughts on gardening for beginners
Here you have it – 20 essential steps that ensure success for beginner gardeners. By following the tips in this beginners guide to gardening, you can learn the basics of gardening and start to enjoy the benefits of your gardening labor..
Remember to start small, be patient, and don’t be afraid to ask for help when you need it. With a little bit of effort and some love for your plants, you can create a thriving garden that brings you joy for years to come.
So get outside, get your hands dirty, and start growing!
Happy gardening!
You have read: